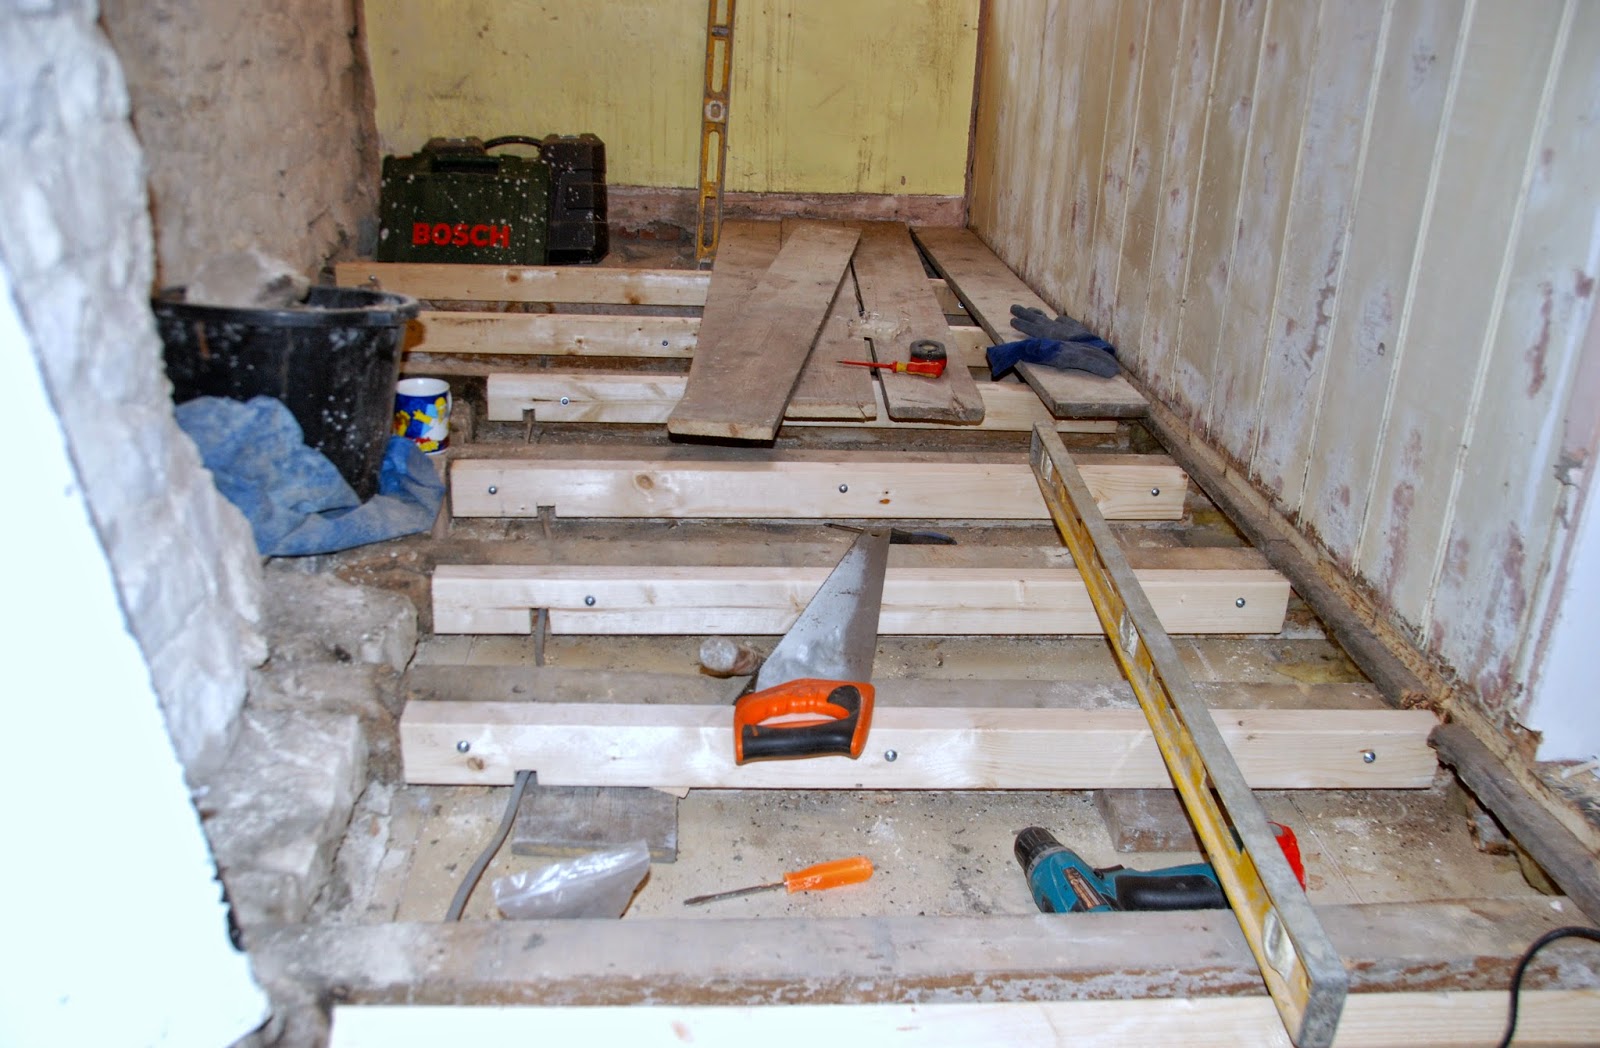
One girls DIY restoration of a cottage.

As far as possible we, me and MeWally, want an old age with low, or no, utility bills. We also happen to be stingey with money and will make as much eco stuff as we can and build it all into our tiny house.

So we'll have a comfortable home that's cheap to make and to run. RESULT!!

Monday 26 December 2016

Kadampama Buddhist Centre, Spain - 9-14.12.16


Our Tasks!!

TASK 1
Pop a new tile on the step.
Not a perfect match, a bit short, and too wide, but when cut to nearest size, it was ok.

As long as feet stay off for a couple of days, it should be fine.

TASK 2
Clean out the rain water gullies and pipes.

 2 of these gullies were full of silt after the flooding the week before. The grills were lifted, painted where they rested on their frames and then marine greased - to stop them rusting together - again.
A few moments rodding the underground pipes and water flowed once more.
Its' a job that needs doing after every rain event.

We put a small hole through this courtyard wall too - to let a big puddle flow away.
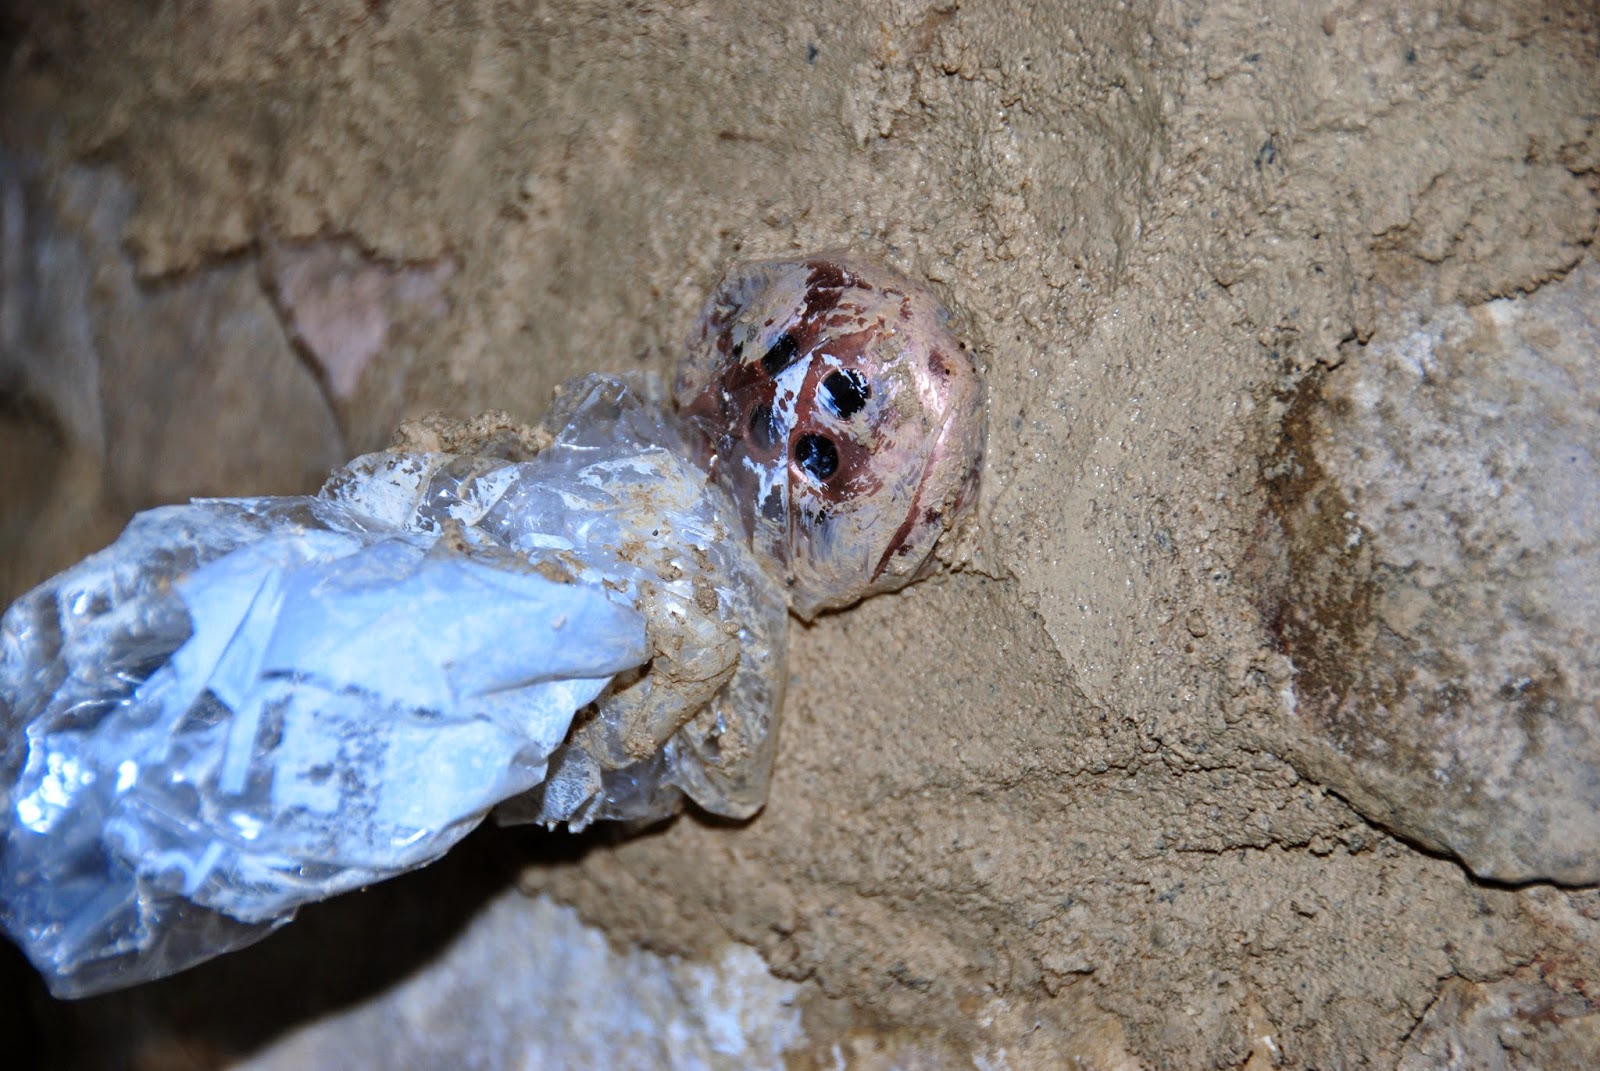
TASK 3
Work out why a room flooded and stop it happening again.
First thing to say is  that it'll take more than just the two of us to stop global warming.

Mid storm, with water at shin level, a hole had been smashed in a garden wall in a desperate attempt to let the flood water run away.
We simply deepened the hole and neatened it up,
then dug some simple gullies through the lawn hoping to channel the water towards the hole.

 
 On the other side of the wall the land falls away steeply and had been hurriedly trenched.
We widened the trench and built up the mouth with boulders -
although we don't know why we did that.
 Later we neatened up this side of the hole too.

TASK 4
Raise an inspection hatch and cover it securely.

The original hatch was about a foot below ground level and loosely covered.
'Water' had flooded in and then entered an ensuite and its' bedroom.

A few courses of bricks later, and rendered, it all looks more like an every day, run of the mill, inspection hatch.

We wrapped the hatch in plastic sheeting and back filled it.
The last job was to fit the capstone into its' new frame.

How well it all sits together.
Shame it looks like a bomb hit it!


Thursday 14 May 2015

Moving the Electricity Supply to Our House - week of 7.5.15


With a set of cables attached to the central, upper part of our front elevation and a meter box either side of our porch, our place will never look attractive.

Western Power will connect up an underground cable for us.

Trouble is we have to bury it and put on a new meter box, all to their specifications.


The following shots represent 3 days hard labour for 2 men and evidence for the Leccy Co., should they need any clarification. 

It had better be worth it!

Oh and the cost for the whole job, materials, Western Power, our builder digging ......?

Just over a 
GRAND!

 No trench under the path, simply a tunnel rammed through the soil and then lined with a thick plastic pipe through which the conduit will run.

 Trench about half a metre deep.

 Sand in the bottom, conduit laid on top and some armoured cable.

 We've laid an armoured cable so that we can have the leccy to the annex running underground rather than overhead, as it is now.

 Lawn protected by a tarp before the spoil's tipped on top.
The same goes or the plants (just out of shot) put onto a tarp and wrapped at the roots to help them stay moist.

 Before infilling, the whole lot has to be covered with warning tape.

 Then we infill. Here we've cut and lifted a slab of our decorative cement terrace then trenched it.

 Another tunnel crosses under the side path
and the conduit is attached to the 'hockey stick'.
The tricky bit?
Getting the string that runs all the way through the conduit up through that skinny 'hockey stick'.

 Everything goes into the tunnel!

The slab is replaced and the plants go back in. 
It looks a muddy mess and takes an evening to full clean the paths.
Non-the-less it's ready for the hook up, apart from the new meter box, which we now have, having ordered it in.

Sunday 3 May 2015

Spare Room Start Off - 1.5.15

MeWally has to run all upstairs wiring through the bathroom; and some of the downstairs too (lighting). From there it'll be fed to the rest of the house.

So, floorboards up in the neighbouring room and again we get a glimpse of the top of the ground floors' stone wall and the method used to support the floorboards at the correct height. Stone work's looking revolting, but will clean up OK.

MeWally intends to sort the floor in here next, because it's in the same state as the bathrooms was which will make running services unpleasant. 

Also we know the floor has an amazing slope to the south which can be rectified as he works. 

Lot of work on what will appear to be a very simple room.

New Bathroom Floorboards - Old Elm! - 24.4.15


We're going to be short of floorbpoards because we have to lay boards at 90degrees to their original orientation. That's to do with having had 2 layers of boards and now having just one layer. Think about it!

 So we cast around for something special and found these slightly wormy, rather wide, planks.
As you can see, they needed sanding as they were in the same state as when they were lifted; limed planks with black stained edges. Here in the UK the fashion was for oil cloth/lino/rugs to be at the centre of the room with the floor boards stained black where they showed, thus making a contrasting border.

Lovely grain; much more interesting than oak and so hard to get hold of since Dutch Elm disease decimated our population.

Can't wait to see them nailed down, but in the meantime, they're going to be sacked in our airy wood shed for safe keeping.

Sorting The Bathroom Floor

The floor boards are coming up and revealed are the original wide planks that this ex farm building had and fibreglass insulation stuffed between the joists.

Dirty work, and MeWally's gotta do it.

We have a bow in the living room ceiling below, because of a distortion in the joist. We're happy with that, but the sag in the floor above is scary.


MeWally decided to level all the joists by beefing them up by using battens. The bathroom will have a floor as level as a billiard table - hopefully!

 Looking good huh?

Chimney Breast Restoration - March 2015


There's a lot going on inside our restored chimney breast.
 You can just see 3 pipes protruding from one side?

 Lime mortar goes on rough and is worked (rubbed) smooth, as it begins to cure.

 Copper studs have been protected from the lavishly daubed lime mortar.

 Here's another little window on the inside of the chimney - why?

 Here are the 3 pipes again.

 So before I got on with the pointing MeWally had added all sorts of things to the woodburners' flue.

 So, we have set up 2 convection tubes; one for the bathroom and one for the landing.
Air intake to the copper tubes if at the bottom of the chimney and the outlets are at the top.
Simple.

 MeWally made the inlet and outlet holes look interesting.

 The idea is to go for a steam-punk feel. This inlet pipe consists of 3 x 22mm copper pipes soldered together and

 emerging near the top, having been strapped to the flue on the way. The 3 pipes will form a towel rail once the new partition is constructed.

The chimney breast, fully pointed with all that clever stuff going on inside.

Bathroom -The continuing story!


In a normal house one bathroom is ripped out and another plonked in. It doesn't take long.
 But we have other ideas. We want a reveal of stuff that's been wrapped in plaster for many years.
Looks great, doesn't it?

 This is a shot of the stone wall that the lower level of the house is constructed from. There's a step where the 1m thick limestone walls finish and the 9" thick brick walls were added to form the top floor.

 The new window is in. On the inside, it will look like a narrow slit.

 On the outside it looks neat.

And once again we lug up the bits and bobs, so that we can decide if we'll use the hall stand as a sink base.
The answer is no, as it's so heavy looking and big. It's a re-think for us.